Drumming in Intimate Spaces
A New Clinic
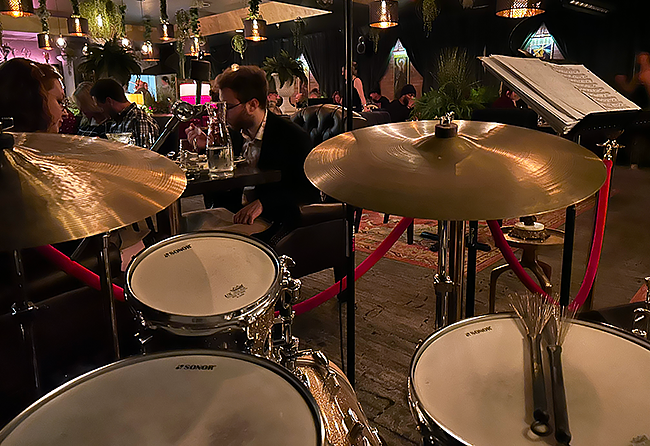
Portland-Native Kurt Deutscher has made a career playing the drumset in intimate spaces, including major retail stores, restaurants, libraries, private homes, children’s hospitals, riverboats, and once on a rolling dinner train. He’s been honing his accessible approach to drumming for over four decades and has logged thousands of individual performances; many of them playing within arm’s reach of his audience.
This two-hour clinic is intended for drummers, and the musicians who work with them, who want to learn a little more about the challenges and rewards of taking one of a band’s loudest acoustic instruments into some of the most intimate of spaces. Kurt will be discussing and demonstrating some of his quieter approaches to drumming, and some alternative methods too. Then he’ll open things up for a question-and-answer session.
1. The Dynamic/Volume Bell Curve Concept
- Stretches over the whole gig
- Setlists matter
- Starts when you walk into the room with your gear
- Happens within pieces of music too
- Ends when you do the “Idiot Check” after you’ve loaded out and are saying goodbye to the staff who are still stuck there working
2. Don’t play a note until the performance starts.
- Let your audience warm up to the idea that drums are in the room first.
- Avoid the temptation of playing/tapping/brushing your kit before you perform.
- Tune/tension your kit before you get to the gig (drum dial)
- Warm up before the gig and/or during the first tune of the night
- If the drums need to play during a “sound check” then you are not in an intimate space
3. You may not have to play all the time (pun intended)
- If your band is solid, let them have some space.
- Bass & Face or some other duo before you start adding to the textures
- You don’t have to start every tune, and you also don’t have to finish each one.
- When you aren’t playing, you need to listen to the other musicians and avoid becoming a distraction. Nothing builds tension like the drummer just sitting there quietly listening to the band.
4. Play one note at a time / linear grooves and fills
- Start with triplets
- Try removing duplicate notes from your groves
- Create melodic fills and solos vs. rudimental
- Find the “scales” on your kit and practice them
5. Standard wisdom is to dampen parts of the kit and/or tension the drums with methods that reduce the natural sustain of the drums.
- It’s common in some styles of music for the snare drum to be tensioned so that the sound is completely dry, with almost no sustain.
- In classic bebop recordings, the toms were often tensioned this way, partly to pitch the drums out of the range of the bass, to get better rebound for the drummer, and because the bearing-edge of the drums were thicker than the ones most of us play on modern drumsets, so looser heads sounded choked out on some kits.
- Also, and this isn’t talked about often, the drums were often pitched up in the recording studio because the recording technology would distort the sound of the drums when tuned lower. In fact, on some classic recordings, the drummer was told not to play the bass drums at all, and on many others, the bass drum is dampened until it sounds flat; all to prevent the drums from over-riding the recording gear and causing distortion and interfering with other instruments.
- I believe that people got so used to listening to drums on the recordings, vs. how they sounded live, that drummers started dampening their own drums to make them sound like the popular recordings. Kind of in the same way that there are drum-dampening methods today to help a live drummer sound more like a drum machine.
- When I started my career, it was common to see tape all over drums’ heads and the back of cymbals. This quieted down the drums and cymbals so players could play harder without getting as loud.
6. Play naked; sustain is your friend, use it to your advantage.
- Let your instruments ring out on their own AND in the space
- Let your drums ring, let your cymbals hum and sizzle
- Remove anything and everything from your drums and cymbals that could be dampening their sound. You spent a lot of hard-earned money on that kit, let’s hear it!
- Tension your drum heads so that they have a clearly audible tone/note at the lowest possible attach. If you can tap them, and they start sounding like the side of a box, then they are letting you down when you try and play them softly. If tensioning isn’t getting you there, then you might try different drum heads.
- Remove any and all sympathetic vibrations from your kit, including pedals and stands; it must all be “recording studio silent”.
- Do you need the snare “on” right now?
- Float your cymbals. Talk about my experience with the CRS product.
7. Develop a vocabulary with each cymbal.
- How long does your cymbal’s sustain actually last (let’s give it the ear test)
- How you angle a cymbal changes its volume, because the edge is silent
- Once you have the vocabulary, try substitutions that may create the “feel” without the volume
- Where and how you set it into vibration changes everything
- Angle of attack and brushing vs. tapping
- Know your dishes personally
- Know which cymbals to take on the gig
8. Come together! Kit Setup Ergonomics.
- Centering yourself
- Note that I’m a first-generation matched-grip player who’s never played trad.
- Drum height, placement, and their relationship to feet and cymbals really do matter for the player.
- Gentle drumming has a look, and it may not be what you think.
- Micro-movements and conservation of motion.
- Use alternate stickings and stick control to minimize movement.
9. What’s in your wallet (stick bag)?
- We have nearly the same tools in our stick bag as an oil painter has, yet we paint with sound.
- Get to know the textures and sounds available in your bag.
- Have at least one fun/cool/frustrating to use thing in there that’s not in your BFF’s bag.
10. Smart Gear Choices
- Talk about my three kits, the tenor, alto, and soprano.
- Talk about matching bright heads and cymbals with darker sticks and brushes, and dark heads and cymbals with brighter sticks and brushes.
- Smaller, thinner, darker cymbals might help.
- Thinner heads will help.
- Brushes, brooms, rods, and what the Frijoles is that!
11. Groove Substitutions
- Kurt’s “cheater” swinging hi-hat groove
- Fast Linear Bossanova
- Wood vs. Metal (cowbell/cymbal bell) - play Mombo timbale-style
- Brush Bossa
- Stick & Brush combos; when you just can’t decide
- Bolero with Blasticks
12. When it’s time to solo, use your brushes until you feel you can get things happening with rods or sticks; switch to them if you need to
13. Expand your own dynamic range through phrasing
- First play flat, with no accents
- Then only accent to the last part/notes of the phrase
- Then only accent the first part/notes of the phrase
- Now connect more than one phrase together
14. For the advanced player who likes punishment, practice with a live db meter app on your phone, and try keeping it below 15 to 20 dB below where you typically play. For me, that’s around 90+, so when I do this, I’ll practice playing/soloing or rhythm-section trading below 80 dB. Yes, it’s brutal on the ego.